Tutorial for Uploading Images
All Profiled dues paying members may display up to 50 images of their art in their own Profile Gallery. The guidelines below should help ensure a smooth uploading process. The same procedure would apply if you would like to replace older images with new ones. Please note that all postings are required to be in the English Language. Furthermore, HCAA reserves the right to remove any text or images considered in the sole judgment of our Board of Directors to be inappropriate due to obscenity, political themes, or profanity. The privilege to upload images does not extend to uploading images of flyers produced to promote events. The HCAA Facebook page is the appropriate place for such advertisements.
1. Prepare your image, preferably jpg, although png, gif, and jpeg will work, but no other image file types will work. If you try to upload an unacceptable file form you will receive a screen notice to that effect. Make sure that your image is in focus and cropped how you want it. Also check to make sure the image is straight, horizontally and vertically, with no partial frame or unrelated background showing. If you need to do some quick image editing, including cropping, and don’t have editing software, you may try this link to the free PhotoScape Portable software.
2. Our software automatically resizes so that even large, high-resolution files are reduced to fit within our height and width requirements. You can submit image files as large as 16MB; however, as file sizes increase, the work the web server must do to process the images to create a gallery image and a thumbnail will take more time. If the image does not appear in 30 seconds, it will not appear because the server will stop working at 30 seconds maximum. Do not submit low-resolution files more suited to thumbnails.They will not display well in either gallery. The images you upload within your Profile will automatically be added to the HCAA Gallery to display the scope of the talent within HCAA. All of the file types mentioned in paragraph 1 above are acceptable in the separate HCAA Gallery.
3. After you log in, hover or touch “Our Artists” in the top menu. When the expanded menu appears, click on “HCAA Artists”. It will take you to the first of several pages where registered members are listed alphabetically by last name. Click on your name. If you don't see your name, either you have not completed the Registration Process or your registration has not been activated. Note: Usernames and Passwords are issued by our Webmaster who can also assist you in the registration process.
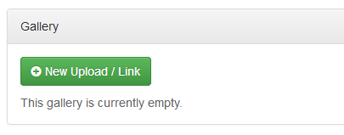
4. You will be on your “Artist Profile” page. At the bottom you will see a section called Gallery. Hit the green button labeled “New Upload”.

It will take you to the upload page where you can simply click & browse to the image file on your computer, or Drag & Drop with your mouse if you know how to do that. There is NO provision for uploading folders containing images. Only individual images may be uploaded.

If you Click you will browse to the image files on your computer where you can select one or more files and then Click "Open". It will look like this:

Upload time will vary based on the size of your total upload and your connection speed. You can see your progress by the blue bar on the right.

When it is finished uploading, your new thumbnail/s will appear on the bottom left.
5. Enter your info for each image.

a. Enter the title in the space provided. Very long titles may not display completely. Consider viewing the HCAA Portfolio to see what others have done.
b. For the Description, please use the following format:
art medium, height x width (in inches) (note: height first for website uniformity), framed or unframed (e.g. Oil on Canvas, 24” x 36”, framed)
c. When finished, be sure to click “Save”! Do NOT click “Done” before hitting “Save” for each image or your work will disappear!
d. Now click “Done”. If you’ve saved your work, click “Ok”.
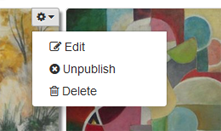
6. If you need to edit or delete a photo, hover over the gear icon on the upper right of the image and click on the appropriate link. You will either be asked to confirm your deletion or taken to the edit page. The edit page looks much like the page you initially used to enter your info for the image.

After selecting "Delete" you will have one more chance to change your mind.

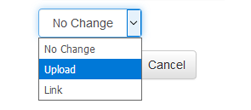
7. If you simply need to replace an image without making any other changes click on Edit as shown in item 6. Immediately under the image in the next screen you will see the words "No Change". Click on the down arrow and select "Upload".

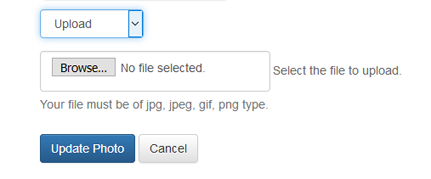
That will enable you to browse to the image files on your computer as in Item 4 to select the file of your choice.

Once you have made your selection and clicked on Open the file name will appear where you see the words "No file Selected" above. Then click on the blue button "Update Photo" and your replacement image will have been saved.
If you have any questions or concerns, feel free to seek help by sending an email to
